![]()
Using Applications and Web Triggers for Channel Control
Tags: web triggers URL URLs URL's Touchscreens Channel Controller RemoteDescription
Touchscreens can be used for Channel Control Applications, using UDP streams, or any content on individual application pages. Unique URLs are created that allow the user to jump to a page and view content.

Resolution
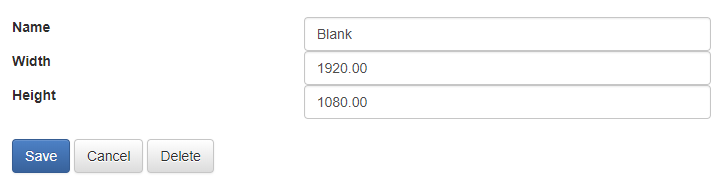
Create A Blank Template
A template is required for the application to work. The template in this example will be left blank.
1) Under Templates, click on the ‘Create New’ button and give your template a name. In this example, we’ll call this template “Blank”:

2) The Template will be added to each application Page that is created.
Create a “Home” page with Triggers linked to each Page
A “home” page needs to be created and “triggers” need to be added to link the pages to the application. The trigger can be a transparent PNG image (100x100 pixels).
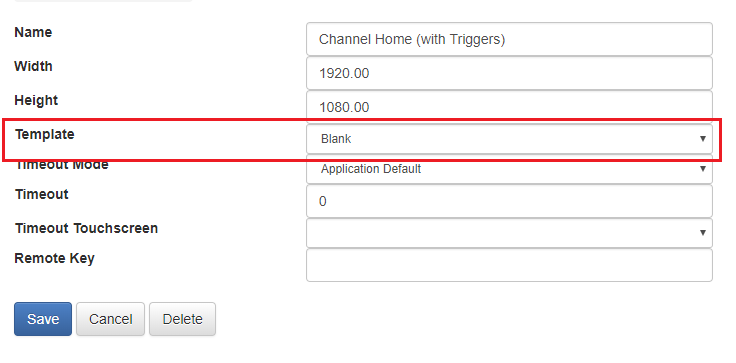
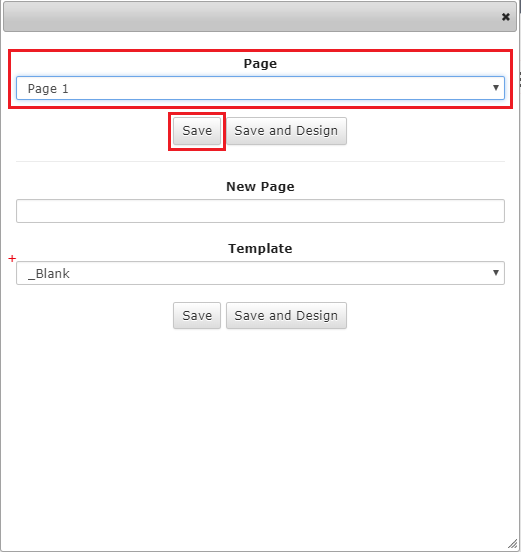
1) Under Pages, click on the ‘Create New’ button and give your page a name. In this example, we are calling the page Channel Home with Triggers.
2) Select the Template. In our example, we’re using the “Blank” template.
3) Click ‘Save’.
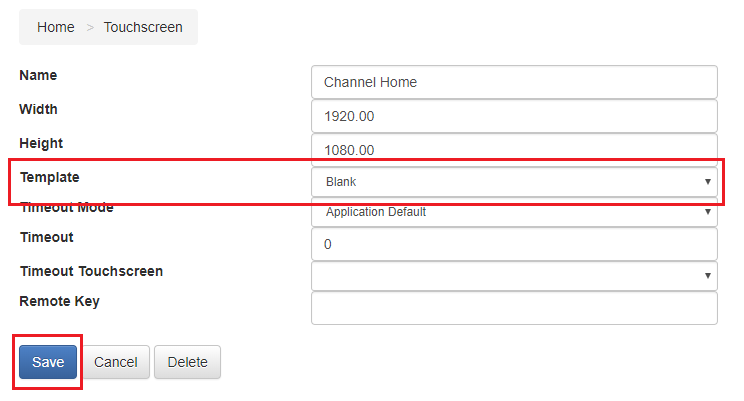
4) Open the Designer for your Home page by click on the Description of the page or the ‘Designer’ icon on the right side of the page line.
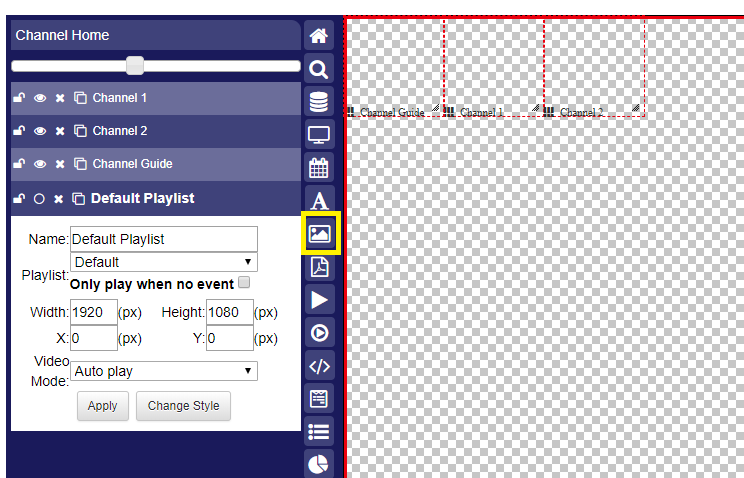
5) If you would like to have a background image or full screen logo on this page, you can add an image by clicking on the ‘Add Image’ icon from the toolbar. This will open the Asset Library where you can upload a new image, or use an image you’ve uploaded prior, or added from the Store:
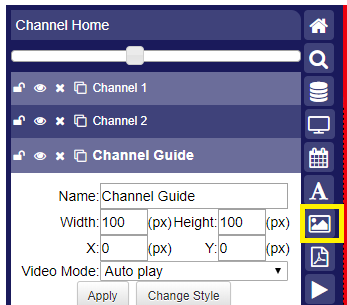
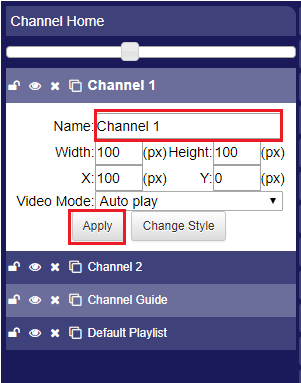
6) Add your PNG triggers to the layout by clicking on the ‘Add Image’ icon and uploading the PNG first, or select from the Asset Library. Add the same PNG image for as many pages you’ll need. More can be added anytime as you add pages:
7) Next, you’ll need to start creating your pages. We’ll come back to the Home page triggers below under ‘Link Home Page Triggers to Pages’.
Create Pages with Remote Keys
1) From the Applications main page, click on the ‘Create New’ button to create new pages for your channels.
2) As you create your new pages, be sure to select your Template (in this example, we’re using the “Blank” template). In this step, you’ll also give your page a Remote Key – this is the key(s) pressed on the remote to “change the channel” to your Pages.
3) Click ‘Save’ and click on the Description or the ‘Designer’ icon to open the Designer.
Adding a UDP Stream to your Touchscreen Pages
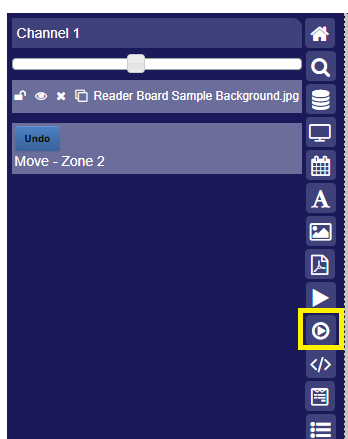
1) Add content from the toolbar icons. If you are using a UDP stream to display a live feed in your layout, click on the ‘Add Stream’ icon:
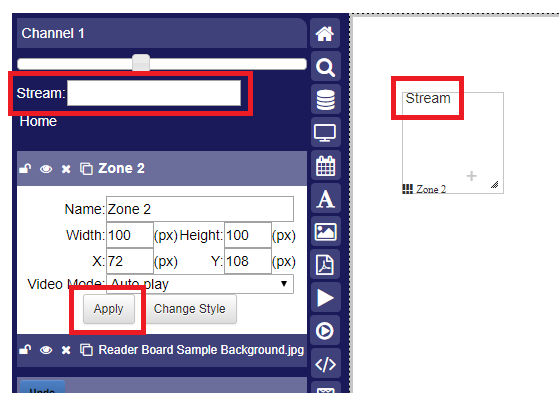
2) When the Stream Zone is added to the layout, click on the “Stream” link and enter the UDP stream URL in the ‘Stream’ field in the toolbar. Then click the ‘Apply’ button on that layer to save. You can then position the stream zone where you want it to display in the layout and resized the height and width of the zone (if you want the stream to play full screen, the resolution will be 1920x1080).
3) Repeat this process for all Pages (channels) that you need as part of your application. The next step will be to link the pages to your triggers on the Home page.
Link Home Page Triggers to Pages
1) From the Applications main page, click on the Description or ‘Designer’ icon to open the Home page Designer.
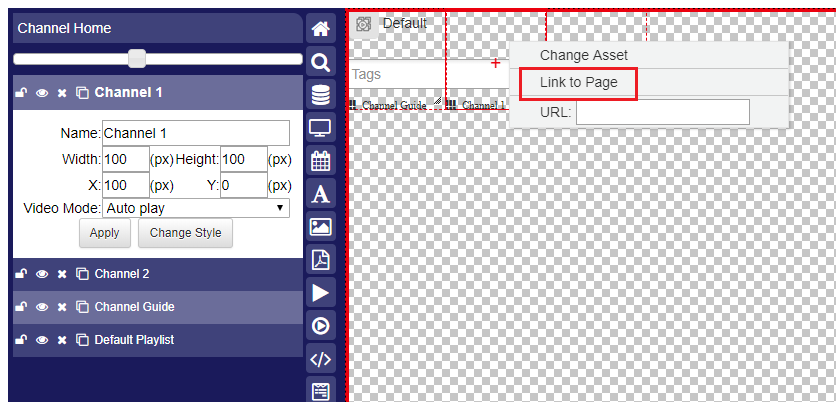
2) Right-click on each trigger and select “Link to Page”:
3) Select the Page to link to each trigger and click ‘Save’:
Tip: You can rename the zone layers in your toolbar for easy access. Click ‘Apply’ to save the new name:
Create the Application
1) From the main Applications page, click on the ‘Create New’ button under Application:

2) Give your Application a name.
3) If needed, a Timeout can be applied. However, this function may not be useful if your Application will be used for live feeds. In this example we will set the Application Timeout to 0.
4) Assign your “Home” page. Tip: This could be a page that shows a channel guide.

You can always return to the Application to see what pages are connected to it and access the Designer for each page.
Assign the Touchscreen Application to Player(s)
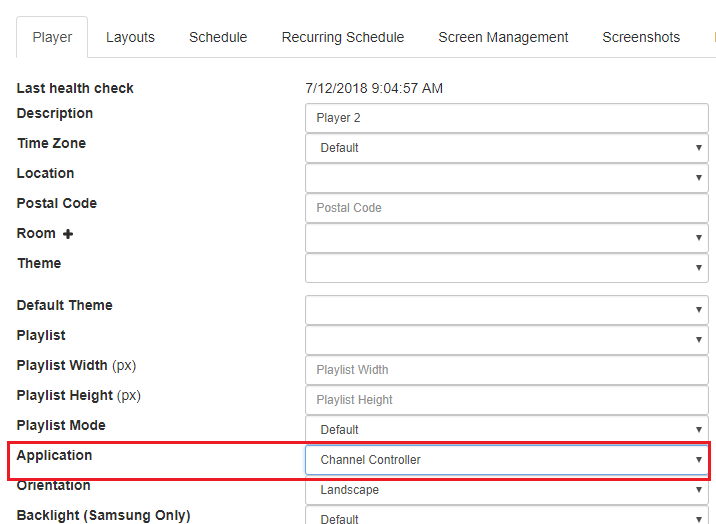
1) From the Home page, click on the ‘Players’ icon. Then click on the Player you would like to deploy the Application to.
2) Select the Application from the ‘Application’ drop down:
CREATING WEB TRIGGERS
Creating Web Trigger Groups
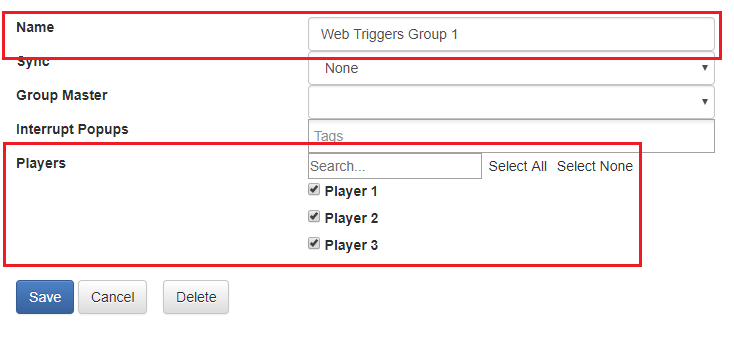
Once the Pages and Application have been created, Players that will be using Web Triggers to change the page will require a Group.
1) From the Home page, click on the 'Groups' icon.
2) Click on the 'Create New' button on the top right of the page.
3) Give your group and name and check the box next to the Players that should be assigned to this group and click 'Save'. This ensures that web triggers will work on these Players:
Creating The Web Trigger URLs
Web Trigger URL's are created using your Player Groups and Pages. The following steps will walk through how to create your unique URL's to trigger commands to change content on your screen.
Each URL will look like the URL below. You will change the Group ID and Page ID to create your Web Triggers.
http://go.pinghd.com/Interrupts/Change?accessCode=XXXX&groupId=XXX&pageId=XXX
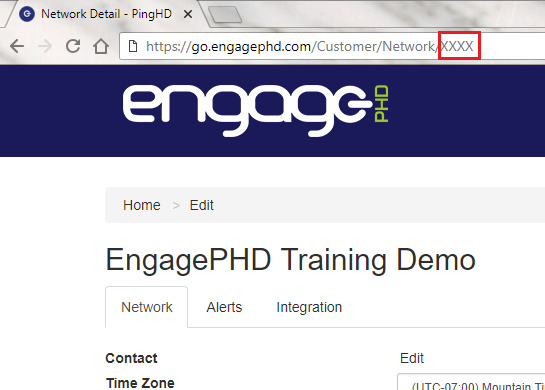
1) Locate your Network ID (which will be the accessCode=XXXX in the URL above and will be the same for each URL you create). From the Home page, click on the 'Network' icon. The Network ID will be the last number in your address bar URL:
2) Go back to the Home page and click on the 'Groups' icon.
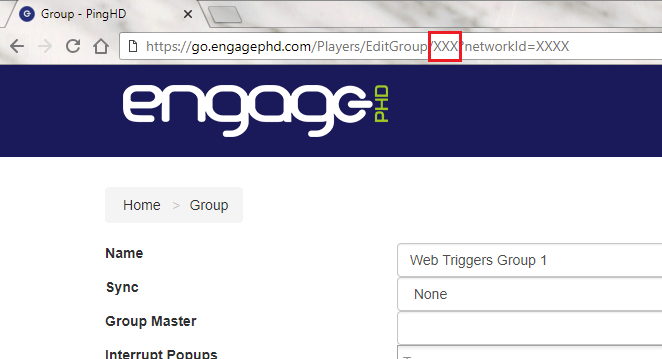
3) Click on the Group to open the Group.
4) The Group ID will be the last number in your address bar URL. Copy and paste this number in your groupid=XXX:
5) Go back to the Home page and click on the 'Touchscreens' icon.
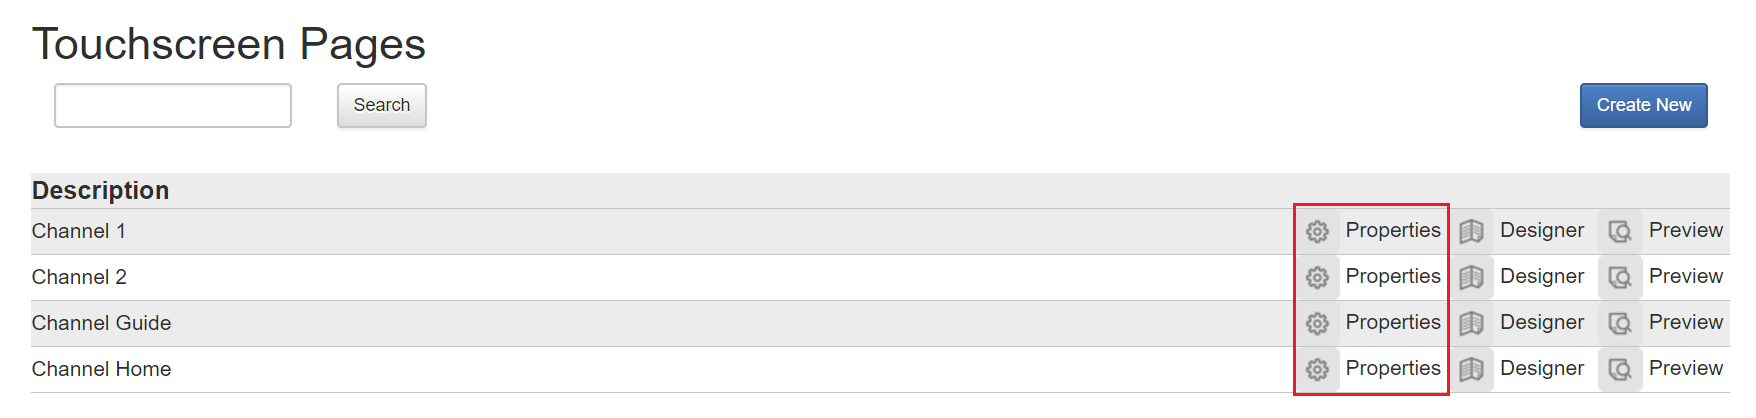
6) Click on the 'Properties' icon for each page to copy the Page ID:
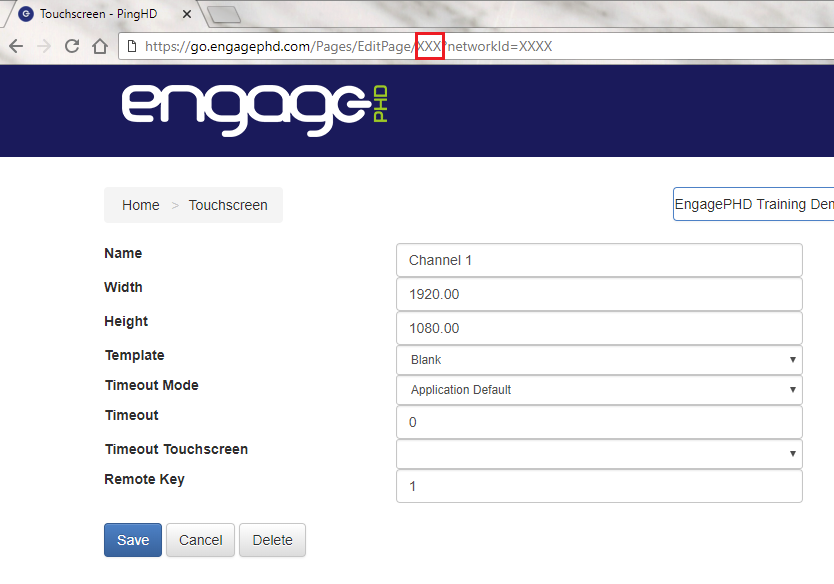
7) Copy and paste this as the pageid=XXX portion of the URL:
Here's an example of two completed Web Trigger URL's: